Sunday, December 19, 2010

Rum Tummy Tummy

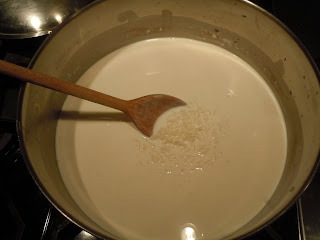
When I was living in London, one of my favorite on-the-go lunches was rice pudding with raspberry jelly from the local Tesco. I know people typically think of rice pudding as a dessert, but I would pretend it was something more akin to yogurt (or as the posh Brits would say, “Yoh-ghurt”). So when I saw the Barefoot Contessa (aka MY IDOL) whip up a batch on her latest show, I hopped off the couch and headed to the grocery store.

This recipe is fairly easy, it just takes some time and vigilance.


Ina Garten’s Rum Raisin Rice Pudding

Ingredients
¾ cup Raisins
2 tbsp Dark rum (I picked up a super tiny bottle of Myers Dark Rum for $3)
¾ cup White basmati, or long grain rice.
½ tsp Kosher salt
1 Extra-large egg, beaten
1 ½ tsp Pure vanilla extract


Directions
1. In a small bowl, combine the raisins and rum. Stir to coat, and set aside.
2. Combine the rice and salt with 1 ½ cups water in a medium heavy-bottomed steel saucepan. Bring to a boil, stir once, and simmer, covered, on the lowest heat for 8-9 minutes, until of the water is absorbed.
3. Stir in 4 cups of half-and-half and sugar and bring to a boil. Simmer uncovered for 25 minutes, until the rice is very soft. Stir often, especially towards the end.
4. Slowly stir in the beaten egg and continue to cook for 1 minute.
5. Off the heat, add the remaining cup of half-and-half, the vanilla, and the raisins with any remaining rum.
6. Pour into a bowl, and place a piece of plastic wrap directing on the pudding to prevent a skin from forming. Refrigerate. Serve warm or cold.

Tuesday, December 14, 2010

Arabian Night


With the wind chill falling below zero, the snowdrifts covering freshly shoveled snow, and our car doors freezing and reopening on the highway (yes, that happened), Christina and I needed a vacation. Somewhere warm and far, far away from the Windy City. That obviously wasn’t an option (Money? Time? We have neither.), so we decided to cook something exotic instead!

Christina had gone on vacation with her family to Morocco a few months ago, and I was eager to take a stab at one of the country’s signature recipes: a lamb tangine. This dish is named after the special pot used during cooking. A tangine is typically made out of heavy clay for slow-cooked stews.


We may not have had a tangine, but we had most of the ingredients already (moms have the best spice collections!). The one thing we knew we had to pick up fresh was the lamb. This isn’t a meat my family usually cooks with, so I was a little intimidated. Turns out most grocery stores sell lamb in all kinds of cuts, and we were even able to get a pound of the “lamb stew” cut. These are already cut into 2-inch pieces and trimmed of excess fat. Thank you, Whole Foods butcher!

Within minutes of starting this recipe, the house smelled AMAZING. Both of Christina’s parents came downstairs to tell us it smelled just like Morocco. Success! It tasted just as delicious.

Over a bed of couscous, this stew was the perfect cure to the winter blues.


Moroccan Lamb Tangine & Couscous

Adapted from Epicurious.com

Ingredients
½ tbsp Ground cumin
1 tsp Ground coriander
¾ tsp Salt
½ tsp Fennel seeds (nb: Christina and I realized we didn’t have these last minute. Whoops. But it still tasted great without them!)
¼ tsp Cayenne peppar (BE WARNED: This stuff packs a punch. If you don’t like your food too spicey, use less. Christina and I had to eat this dish with a box of tissues next to us.)
¼ tsp Black pepper
1-1/4 lbs Lamb Leg trimmed into 2-inch pieces (or the handy “lamb stew” cut).
2 tbsp Olive oil
1 Medium onion, finely chopped
1-1/2 tsp Tomato Paste
1 cup Low sodium chicken stock
½ of a 15-1/2 oz Can of garbanzo beans, drained
½ cup Organic Turkish dried apricot (easier to find than you’d think!)
2 Medium plum tomatoes
1 Cinnamon stick
1-1/2 tsp Ground ginger
1 tsp Lemon zest, packed
1 tbsp Chopped fresh cilantro

Directions
1. Mix the first six ingredients in a large bowl. Add lamb and toss until evenly coated.
2. Heat 1 tbsp olive oil in a heavy, large skillet over medium high heat. Add the lamb and cook until browned on al sides, turning occasionally and adding 1 more tbsp of olive oil as needed. Cook for about 8 minutes and transfer to a large bowl. Set aside.
3. Add onions and tomato paste to the drippings in the skillet. Reduce heat to medium. Saute until the onion is soft, about 5 minutes.
4. Add broth, garbanzo beans, apricots, tomatoes, cinnamon stick, ginger and lemon zest and bring to a boil, scraping the brown bits.
5. Return lamb to skillet and bring to a boil. Reduce heat to low, cover and simmer until lamb is tender about 45 minutes. Add cilantro about 10 minutes before finished cooking time.

Couscous

1 Box regular couscous
2 cups Low sodium chicken stock
1-1/2 tbsp Butter

Bring stock and butter to boil, add couscous, turn off heat and allow to sit for 5 minutes. Fluff with a fork and serve as a base to the lamb tangine.

Monday, November 22, 2010

J'aime le Chocolat

When I was taking French I my last semester of college, the first thing we learned to say we loved was chocolate. J’aime le chocolat. Our professor went around asking everyone individually, “tu aimes le chocolat?” to which everyone vigorously nodded and responded “oui, oui, j’aime le chocolat!” Except for me. Je n’aime pas le chocolat. Lets be honest here, I’m not about to turn down a brownie or anything drastic like that. But I am also not the type to be upset if one of my housemates mistakenly eats the last of my stash of Dove chocolates. Nor do I even have a stash of Dove chocolates. There is no situation in which I would pick a chocolate dessert over a fruit tart at dinner, and a bowl full of M&Ms can sit next to me for days without disappearing… the same can’t be said for a bowl of popcorn.

Needless to say, I was in a bit of a conundrum when, about to bake a nice apple pie for a friend’s birthday, my friend told me she hated pie and wanted something chocolatey. I’ve never baked anything chocolatey. I wasn’t even sure what that entailed, so I turned to tastespotting.com for help. I found what seemed like a simple recipe (until I noticed the measurements were in grams), and went to work with the help of my friend Alli, a fellow dessert connoisseur – and one that aimes chocolat, at that.

The cookies were surprisingly easy to make. The dough was a weird consistency, and I had my doubts that they would crack like the recipe assures me they would, but in the end, even I have to admit they were delicious (and aesthetically pleasing). The recipe can be found here: http://noobletpatissier.blogspot.com/2010/06/double-chocolate-cookies.html.

The best part about it is that it is wonderfully foolproof. Even hacking an unmeasured amount of a 113g stick of butter to make it (approximately) 100g, and eyeballing 37/56ths of a square of baker’s chocolate didn’t affect the cookies. I might not always aime le chocolat, but I sure did love these cookies.

Wednesday, November 17, 2010

And now for.... Chocolate PLUS Peanut Butter!

Yup. We did it. Another blog about cookies. So sue me. Recently Christina and I were sitting in Panera working on our resumes, giving each other nervous looks when we realized applying for jobs sucks, and coping with the anxiety by buying Pumpkin Muffies. While taking a break (which lasted a while), we realized that both of us wanted to cook something sugary and comforting this week. So we went a little cookie crazy.

I was feeling peanut-buttery (I mean, how good did that peanut fudge look??). But really, what’s the best thing about peanut butter? Mixing it with chocolate, sugar, and butter. Dieters, be warned, this is not a recipe for you. But – it – is – DELICIOUS. Picture a doughy Reese’s Cup covered in sugar. Mmmmm. These would be perfect holiday cookies to hand out to friends, family, neighbors, mailmen, that cute guy on the train, ANYONE. You’ll be the talk of the town.


Chocolate Peanut Butter Surprise Cookies
Adapted from Sweet Peas Kitchen

Ingredients:


1 ½ cups all-purpose flour
½ cup unsweetened cocoa
½ tsp baking soda
¼ tsp salt
½ cup granulated sugar (plus more for rolling)
½ cup packed brown sugar
½ cup unsalted butter, softened
1 cup creamy putter butter, divided
1 tsp vanilla extract
1 egg
¾ cup powdered sugar

Directions:


1. Preheat over to 375 F. Line a baking sheet (though we ended up using two) with parchment paper.
2. In a medium bowl, whisk together the flour, cocoa, baking soda, and salt. Set aside.
3. In a larger bowl, use a beater or stand up mixer to beat together sugars, butter and ¼ cup of peanut butter until light and fluffy. Add the vanilla and egg and beat to combine. Stir in the flour mixture and blend well.
4. In another medium bowl, mix together powdered sugar and remaining ¾ cup of peanut butter until smooth. If it seems too chunky, add more peanut butter.
5. HERE is the fun part. Pull off a heaping tablespoon of cookie dough and flatten in your hands. Take about 1 tsp of peanut butter mixture and place it in the center of the chocolate dough. Wrap the dough around the peanut butter center, pressing to seal. Roll the cookie into a ball and roll cookie in sugar. Flatten the cookies to about ½ thickness, and place on the baking sheet, about two inches apart.
6. Bake in over 7 to 9 minutes. Edges of cookies should have a few small cracks. Let stand on baking sheet for 2 minutes, then remove to a wire rack.


Tuesday, November 16, 2010

Easy Peanut Butter Fudge

Anyone who remotely knows me probably is aware that I had some computer issues over the past few weeks. They also probably know I’ve recently been observing some weird dietary restrictions for medical reasons. I can be a bit of a complainer. Anyway, as a result of my computer problems, I’ve been a bit behind on updating our blog… and as a result of my newly imposed lactose-free diet, my recent culinary excursions have centered around finding sweets that satisfy dessert cravings that don’t have dairy as an ingredient (clearly a problem for me, as earlier this fall dessert basically meant anything pumpkin with cream cheese frosting on top).

A late night watching Alton Brown on the Food Network helped lead me to a creative solution to my problem… Fudge. I spend my summers in Michigan, where fudge is available everywhere from cute little bakeries to gas stations (which I frequent pretty often). While pervasive in my life, I had never really thought about what goes into making fudge, but I assumed it would be difficult. Thanks to Alton, I learned its actually pretty simple… It just takes a lot of butter (this recipe may have been a Paula Deen/Alton Brown collaboration). I picked a peanut butter (one of the major food groups) fudge recipe and got to work with my friend Maureen one afternoon. The finished product was delicious, though it is hard not to be with the amount of butter that went into it. This is definitely a satisfying dessert, even without cream cheese frosting.

Peanut Butter Fudge

1 c. butter1 c. peanut butter
1 t. vanilla
3 ¾ c. powdered sugar

1. Microwave butter and peanut butter for two minutes on high. Stir and microwave for two minutes more. Stir.

2. Stir in the vanilla, then add the powdered sugar slowly while stirring with a wooden spoon.

3. Line an 8x8 inch pan with waxed paper, and spoon in fudge. Press down so it forms to the pan. Cover with a sheet of waxes paper, and refrigerate until cool. Cut into one-inch squares, and keep them in a Tupperware container in the fridge for up to a week.

Monday, November 15, 2010

A Trip to Spain

All my older friends told me I was going to hit a wall in September after graduation and sink into a deep post-college depression. However, while I get a little nostalgic seeing my sorority sisters’ Facebook updates about the college social scene (including spending Saturdays in the library… and I’m not kidding when I say that), I haven’t exactly been pining for my college days. However, one thing do I miss on a regular basis is the culinary experience I had while studying abroad.

I spent the spring of my junior year studying in Madrid, birthplace of my ancestors, while Mary spent the entirety of our junior year in London getting to know the land of her forefathers. We visited each other, and I am not exaggerating by saying we spent the majority of both weeks eating – cupcakes at Hummingbird Bakery, churros at Valor, and occasionally a non-dessert based meal for nutritional purposes.

Recently, Mary and I were hosting some of our friends over for dinner, and we felt that it was time for an homage to our abroad experience.


We went through my family’s plentiful Spanish cookbooks, and settled on two traditional dishes to serve to our friends: sopa de ajo (garlic soup) and ham and cheese croquetas.

The croquetas were an all day affair. It started with a trip to a wine and finer foods store, since our local grocery store doesn’t have a big selection of obscure Spanish ingredients. After picking up the cheese and ham, and a bottle of Rioja, we spent a good five hours in the kitchen making the meal – it finished just in time for the arrival of our friends on their way home from work.

Ham and Cheese Croquettes:

3 c. whole milk
1/2 c. butter
1/2 c. minced onion
2/3 c. flour
salt, pepper and nutmeg
1 1/2 c. (5-6 oz.) Manchego cheese, diced
1/2 c. (2-3 oz.) Serrano ham, chopped
2 t. chopped parsley

Topping:
1 c. flour
2 large eggs beaten with 2 t. water
1 c. bread crumbs

1. In a saucepan, simmer milk and remove from heat.

2. In another saucepan, melt the butter over low heat. Add the onion and cook until translucent. Add the flour, and stir, until a think paste forms. Gradually add the milk while stirring constantly, cook about three minutes until a thick béchamel sauce forms (Mary and I were unsure what a béchamel sauce was... in our case, it is a thick, thick sauce that absorbed the milk like a sponge). Season with salt, pepper and nutmeg to taste.

3. Remove from heat and fold in cheese, ham and parsley.

4. Oil an 8 inch square pan, pour in croquette base and refrigerate until cool, about two hours.

5. Set out three bowls, one with the 1 cup of flour for the topping, the next with the beaten egg mixture, and the last with the bread crumbs. With wet hands, use a tablespoon to create a torpedo-shaped croquette with the base. Dip in the flour and coat thoroughly, then dip in the egg, then finally roll in bread crumbs. Repeat until all of the base is used. Refrigerate until cool, or about two hours (or put in the freezer for 10 minutes like we did when we failed to read the recipes completely).

6. Put three inches of canola oil in a saucepan, and fry a few croquettes at a time until golden - about three minutes. Keep fried croquetas in the oven on low until all are fried.


Sopa de Ajo

1 c. Olive Oil
4 c. stale bread, cut into 1/2 inch cubes
8 cloves of garlic, minced
1 t. smoked paprika
salt
8 c. chicken stock
3 egg yolks

1. Heat olive oil in large saucepan. Add the garlic, and cook about three minutes. Add the bread and cook until golden. Add paprika and a pinch of salt, and cook until fragrant, or about three minutes.

2. Add chicken broth and bring to a boil. Cover and reduce heat. Simmer for 20 minutes. Stir in beaten egg yolks, and serve!

After the intensity of the croquettes, the soup is a perfect simple addition to the meal!


Monday, October 25, 2010

Cinnamon Roasted Almonds

I don’t intend to sound crazy, but being unemployed is a hard job. To give myself some credit, I do spend a decent chunk of my time babysitting and volunteering. Between that and running errands (only important ones, of course… like putting the finishing touches on my Halloween costume), I feel like I am constantly running around. Since I spend a lot of mealtimes with young children, and one can only eat so much Kraft Mac & Cheese, I have been on the hunt for quick, easy snacks I can toss in my tote bag and munch on throughout the day. I think I found a winner in this easy almond recipe – I was inspired by some almonds I bought at a small roadside stand in the middle of nowhere in Michigan last summer that I have been trying to find ever since. I’ll save you the trouble – you can’t find them in any grocery store. But here is the recipe:

1. Preheat the oven to 275 degrees.

2. In a bowl, combine ½ cup sugar, ¼ teaspoon salt, and ¾ teaspoon cinnamon.

3. In another bowl, whisk together one egg white and a teaspoon of water until frothy. Stir in 3 1/2 cups of almonds.

4. Add dry ingredients to almonds and stir until coated.

5. Bake for 75 minutes on a greased pan, stirring every 20 minutes or so.

These almonds keep really well in airtight containers, and make a great snack/dessert.

A Seedy Halloweeny!

I promised myself that I wouldn't write anything else about pumpkins. I mean, Christina and I went through about 3 pounds of pumpkin puree. Overkill. BUT I had to make an exception when my cousin and I decided to carve pumpkins. One of my favorite things about Halloween is PUMPKIN SEEDS. They're healthy, tasty, and fun to remove from the gooey gourd. We used the seeds from two pumpkins, washed them in a colander to remove excess goo, and dried them on paper towels.


My pumpkin, a little lompsided. Think along the lines of "Sloth" from The Goonies.


Once the seeds were dry, we decided to make three batches of seeds: One with salt, one with cayenne pepper, and one with soy sauce.

1. Preheat the over to 300 degrees.
2. For the salt batch, drizzle olive oil and salt (to taste) on the seeds laid out on a baking sheet. Mix seeds with hands on the sheet for even coverage.
3. For the cayenne pepper batch, again drizzle olive oil on the seeds, and add a dusting of cayenne pepper. Also mix with hands to coat.
4. For the soy sauce batch, add seeds to a ziplock bag. Pour in a drizzle of olive oil along with a hefty amount of low sodium soy sauce. Mix seeds, and allow to sit (we only let it sit for about ten minutes and they still tasted delicious). Spread evenly along baking sheet.
5. Bake seeds 20-30 mins, until crispy.

These taste great on top of salads, especially the soy sauce seeds! The cayenne pepper had a really great kick, and the salt and olive oil is the classic favorite.

I would have posted a picture of the finished product, but I honestly ate them all. In a day. So much for a "light, healthy snack".

Monday, October 18, 2010

October Oatmeal!

So I’ve been complaining a lot to my friends lately about how I’m unemployed. But let’s face it. This economy is rough and I’ve really only been without a job for a two months. It’s time for me to be the optimist. Something will come along! At least that’s been my mood this week. Waking up a bit more chipper than usual, I decided to skip the raisin bran and make myself a proper fall breakfast. To tell you the truth, one of the best things about not having a job is taking my time in the morning. I can get up without an alarm, go on a run, read the paper, yada yada yada.
This morning was particularly glorious. The air was brisk, the lake was blue, and the trees were orange.


The day called for a great breakfast. The kind of breakfast that gives you the energy to make a few more calls about possible employment….
OATMEAL. Now, as a child I hated oatmeal. My mom tried to tell me it was healthy, and that instantly made me loathe the bowl of goo. But this oatmeal changed it all. It’s got everything: crunch, sweetness, tang, and than extra hot and filling feeling that makes your stomach feel like you just gave it a big warm hug. To make this recipe even better, it’s the easiest thing to make.


October Oatmeal
Adapted from The Craving Chronicles

1/3 cup oats
¼ of an apple, peeled and diced
2 tablespoons chopped pecans (or walnuts)
½ teaspoon cinnamon
1 tablespoon real maple syrup (though plain ol’ Log Cabin would probably taste just as good)
1/3 cup milk
¼ cup water
Pinch of salf
Golden raisins (dried cranberries would work, too)

1. Combine the oats, apples, pecans, cinnamon, and salt in a bowl.
2. Add the maple syrup, milk and water to the dried mixture and stir to coat.
3. Microwave for approx. 2 mins, microwaving in additional 20-second increments until most of the liquid is absorbed. But you don’t want a dried oatmeal cookie-like brick either.
4. Top with raisins or dried cranberries. Serve with a hot, strong cup of tea. Mmmmm……

Thursday, October 14, 2010

A Chili Fall Day

I'll apologize now for my attempts to be as punny as Mary in her blog titles, and for the fact that we’ve been on a bit of a blogging hiatus. I’ve been prepping for a job interview, which means my nervous baking habit is in full force, but following cookie recipes from How to Cook Everything is hardly a work of culinary genius.

However, when we woke up yesterday morning and it was in the low 60s and pouring rain, Mary and I knew it was just the day for chili. We had a dinner date with one of our vegetarian friends, so we searched for a good veggie chili recipe, and selected a vegan/vegetarian/gluten-free one that looked good.

The recipe required a lot of prep work, as once you start adding things to the pot, you have a pretty fast paced 20ish minutes before you can let the soup simmer (or whatever you may think that means... Mary and I had a lengthy debate about the different stages of boiling). So we channeled all of our favorite Food Network stars that always seem to have everything perfectly washed, diced and measured out in cute little bowls within arm's reach and were on our way. As you can see, we decided to go for a mix of black beans and kidney beans. I was skeptical at first, but it worked out well.

Here's the recipe we used (adapted from the Curvy Carrot):

3 tablespoons canola oil

1 medium white onion, diced

1 large red pepper, seeded and de-ve

ined, and diced

6 large cloves of garlic

1 tablespoon cumin seeds

3 tablespoons chili powder

1/4 tablespoon cayenne pepper

1/2 tablespoon curry powder

1 28oz. can crushed tomatoes

1 teaspoon dried oregano

1 tablespoon brown sugar

2 15 oz. cans of beans

1 cup corn kernels

1 1/2 teapsonns salt

1/4 cup coarsley chopped fresh cilantro

juice from 1/2 a lime

cheese and sour cream to top

1. Heat the oil in a large pot, add theonion and cook until translucent and softened. Add the red peppers and cook till onions begin to brown. Add the garlic and cook for about a minute.

2. Push the vegetables to the perimeter of the pot, leaving a clearing in the middle. Add the cumin and cook while stirring in the center of the pot.

3. Stir it all together and cook until you can smell the cumin, about a minute. Add the chili powder, cayenne pepper, and curry powder and stir, cooking for about another minute.

4. Add 2 cups of water and stir well. Bring the pot to a boil, then reduce heat and simmer until slightly thickened.

5. Stir in the tomatoes, oregano, and brown sugar, and simmer for about 25 minutes.

(Mary using her mother's tried and true cilantro chopping method)

6. Stir in the the beans and corn, remove the pot from the heat and add salt, cilantro, and lime juice.

Serves 5.

We also supplemented our meal with perhaps the best corn muffins I have ever had. We found the recipe here: http://www.beckybakes.net/2010/01/10/sweet-corn-muffins/.


Thursday, September 30, 2010

Gourd-geous Pumpkin Recipes!


The leaves outside are beginning to fall, there's a crisp feeling on the air, it's football season.... and we're not back at school. September and October are supposed to be the hardest months for all post grads, because we've finally realized that we won't be at homecoming! Well, except for Christina. She's left me in the kitchen while she lives out the glory days. But no worries! Before she left, we decided to whip up a batch of Pumpkin Scones! I mean, really, what sounds better?


We followed this recipe via www.littlebluehen.com though with a few minor tweeks. For one thing, I don't like raisins in my scones. Christina begged to differ, though I won out. We both agreed to leave out the pecans, and have our scones plain and simple. They turned out pretty well! And with two people in the kitchen, they were a cinch to make.


Scones are the ultimate comfort food. When I lived in London, I'm pretty sure I had tea and scones at least twice a week. But these were a great alternative! They kept for about a week and were delish with a little butter and tea. Mmmmm......


We only used about half of the pumpkin we bought, so I decided to figure out a way to use the rest. I found a pumpkin-cherry-chocolate-oatmeal-cookie recipe on www.mybakingaddiction.com . It sounded great, but the final product was a bit much. I used chocolate chips instead of white because it was all I had, and I think it added a weird tang to the cookie. Also, because I tried to use up the rest of the pumpkin puree, the cookies took FOREVER to bake. And they were super floppy. I'd use this recipe if I was trying to get rid of ingredients in the kitchen, but definitely wouldn't bring them to a party.


Tuesday, September 28, 2010

Our first foray into the world of post-college cooking began the same day Mary told me about tastespotting.com. The website is truly a foodie's heaven. It describes itself as "a highly visual potluck of recipes, references, experiences, stories, articles, products, and anything else that inspires exquisite taste," and it is a serious step up from the frozen White Castle burgers Mary and I would microwave and dip in ketchup after school when we were ten.

Anyway, Mary and I settled on a risotto recipe, and we decided to give it a go. For those who didn't graduate college in the past ten years, it may be hard to remember what a college student's kitchen is like. It's not pretty. Fresh veggies are a rarity, and the only thing you are guaranteed to find is pasta and cheap wine... and this is coming from someone who enjoys home cooking. Cooking my first meal back in my parents' home was a drastic change. The main difference is that my mother manages to keep the kitchen fully stocked with anything one could ever need to cook anything, literally. Mary and I stopped by our grocery store to pick up some key ingredients and were on our way.

Mary ate a lot of risotto in college, and every few minutes would interject our conversation with different quick, tasty things you could add to Arborio rice (edamame? asparagus?), but it was my first experience with the grain. It is pretty labor intensive, this isn't the kind of meal you can put on the stove and ignore while you drink a glass of wine. The prep work involved a lot of dicing, but once the ingredients get cooking, you can expect to be standing over the stove for the better part of an hour.


In the end the recipe was a total success. We ended up having to ditch the original frying pan that we used for the mushrooms and leeks and substitute a wok in its place - the recipe makes a LOT of food. Thankfully leftovers are not a problem with risotto, as they make great "risotto pancakes" the day after. Just form them into little pancakes and fry in olive oil. Yum.


Here's the recipe: http://whiskflipstir.com/2010/09/01/mushroom-leek-risotto/
Why, hello!

Why another food blog on the blogosphere, you ask? Well, we, like many before and after us, are living at our parents' house. After graduating college. Because we can't afford to move out. And what better way to pass our time when we're not (ahem, avoiding) applying for jobs? COOKING! Best friends for almost two decades, we've taken it upon ourselves to learn everything we can about the fine arts of baking, broiling, and basting. Gotta recipe for us to try? Let us know! Tell us we're going to kill ourselves holding the zester that way? We'd love to hear about it. So let's start cooking!